Introduction
The service Certificate Manager from Amazon Web Services (AWS) is a very useful service to manage certificates without any concern about maintenance for example certification expiration date. You can setup a certificate in few minutes and use it on AWS Resource, for example a EC2 through a Load Balance. The benefits are reduce setup work, low certificate costs, zero maintenance and an excelent certificate quality (you can check using Qualys SSL Labs). This article shows step-by-step everything you need to know about configuring HTTPS on a EC2 server running Windows Server 2016 using a SSL certificate from AWS Certificate Manager.
Table of Contents
- Configuring Certificate Manager on AWS
- Creating an EC2 server running Windows Server 2016
- Creating and configuring an Application Load Balancer
- Updating DNS zone
1) Configuring a Certificate Manager on AWS
The first step is setup a certificate on AWS Certificate Manager (ACM), so if you don’t have an AWS account, create it before follow these steps. It’s possible using ACM in: Elastic Load Balancing, Amazon CloudFront, Amazon API Gateway, AWS Elastic Beanstalk e AWS CloudFormation.
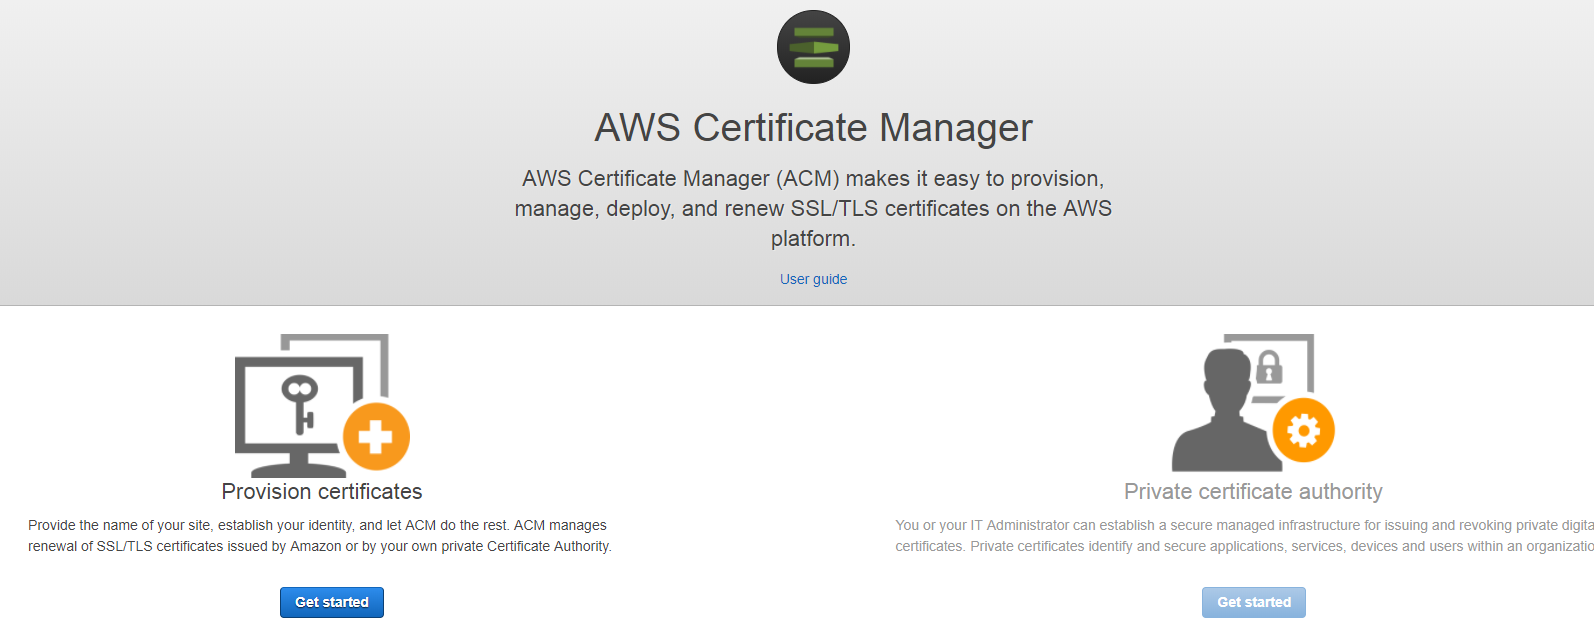
1.1) Requesting a public certificate
Select “Get Started” to provision certificates. By default, public certificates are trusted by browsers and operating systems.
1.2) Entering a domain that will use the certificate
It’s essential define how/what domains will use the certificate.
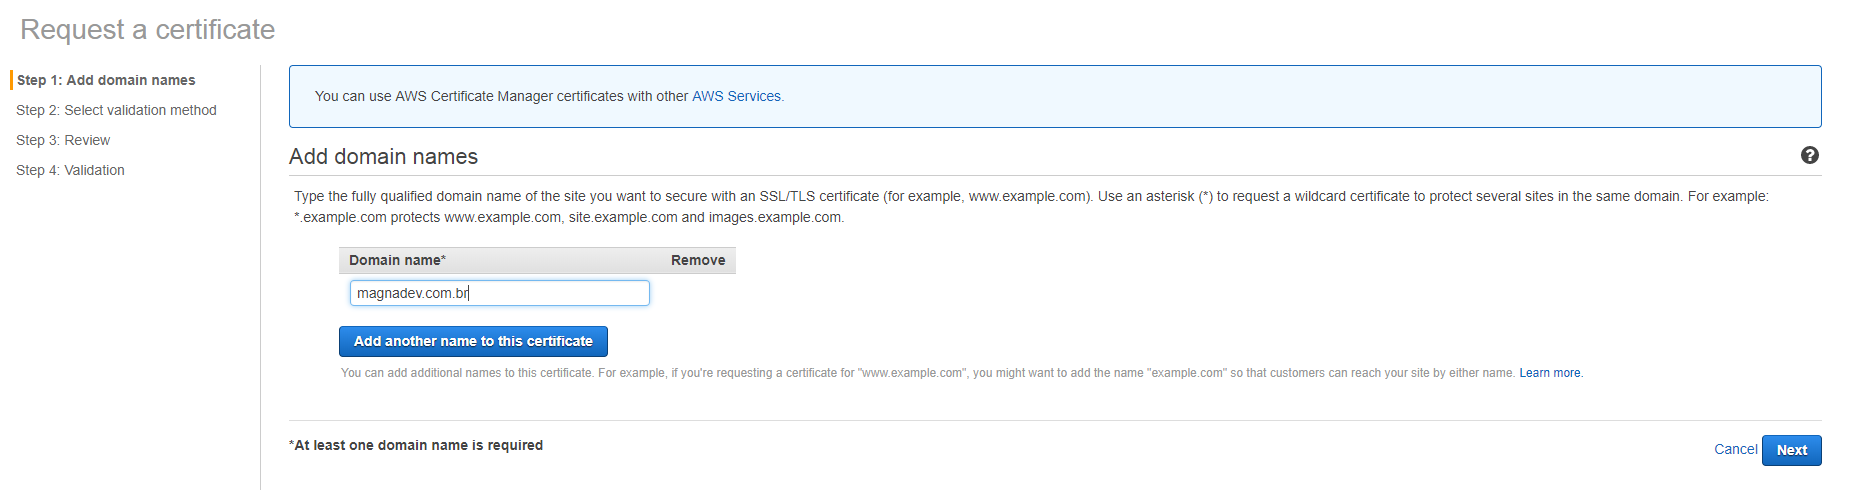
1.3) (Optional) Entering a subdomain that will use the certificate
If you need to use the same certificate to subdomain for example anything.aws.com it’s necessary to define each subdomain during the creation process. It’s not possible to change it after certificate created. If you need more than on subdomain and there are needs to scale for future subdomain it’s recommended to use a wildcard (*).

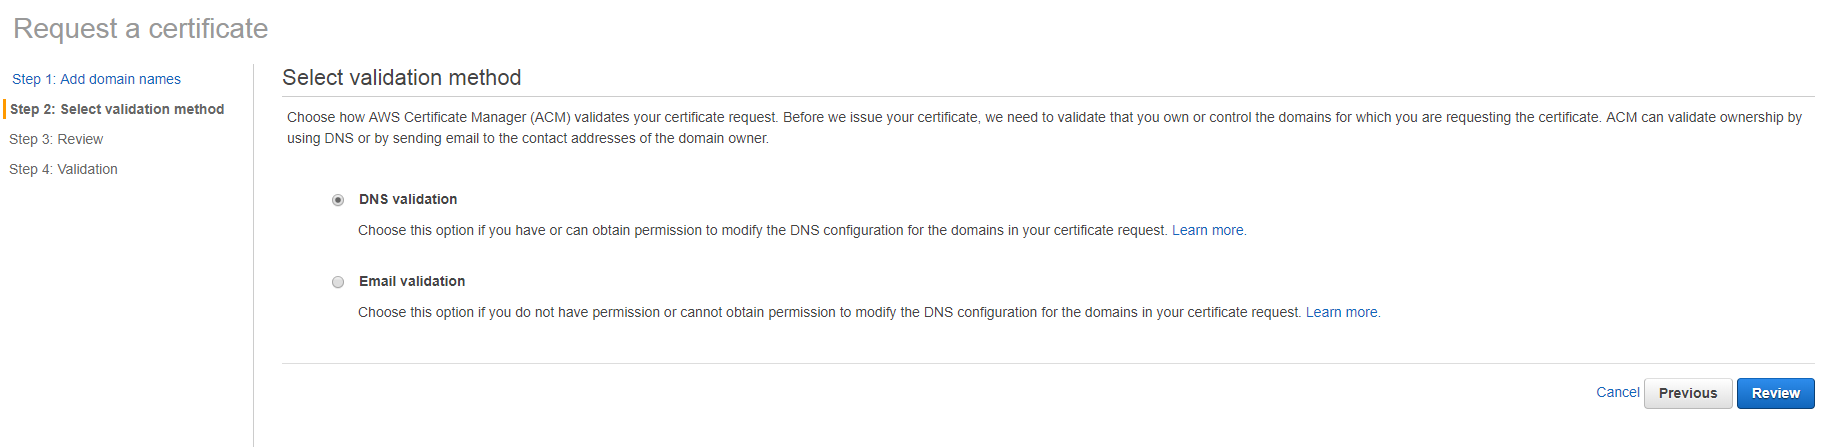
1.4) Selecting a validation option
There are two possibilies to validate the request: Email or DNS. In this article I will choose Email option because it’s easier than DNS option,but if you chose DNS, you need to configure some entries like CName. This configuration it’s possible in Route 53 Learn How Validate From DNS.
IMPORTANT: Verify if you have access to manage emails accounts like administrator@domain, webmaster@domain, postmaster@domain, hostmaster@domain or an email account in your AWS Account. It’s very important because if you don’t have, the e-mail verification can’t be delivery and the validation proccess will be stuck. It’s very boring and frustating.
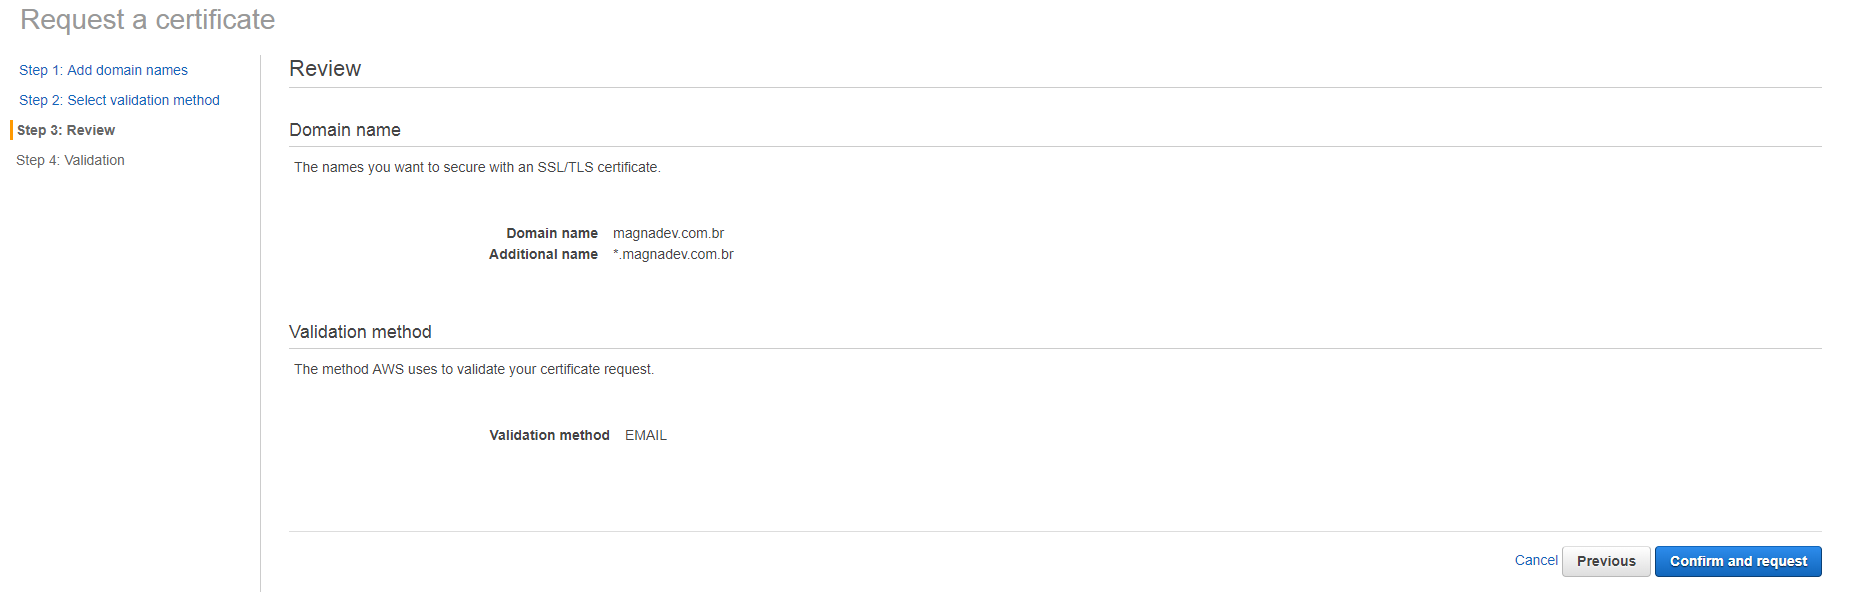
1.5) Confirming all of information
Pay attention before confirm the information because you can change anything after certificate created (just delete and recreate).
1.6) Sending the verification e-mail
How mentioned in the step 1.4 the verification email will send to following emails accounts acording of your domain and AWS Account configuration.
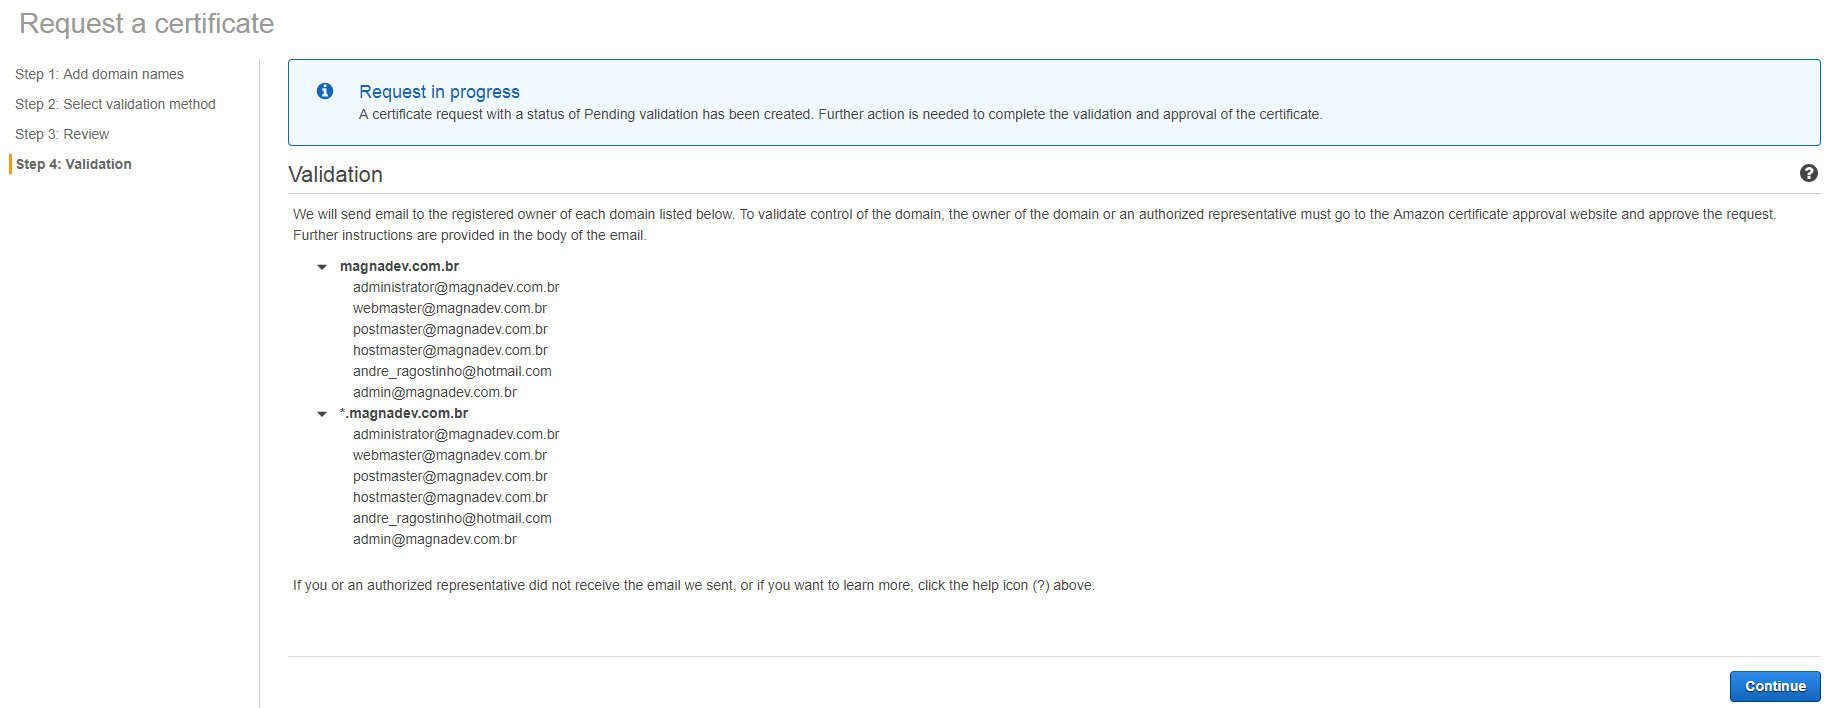
1.7) Receiving the verification e-mail
If everything was configured correctly you must receive an e-mail with a link for validate the certificate.

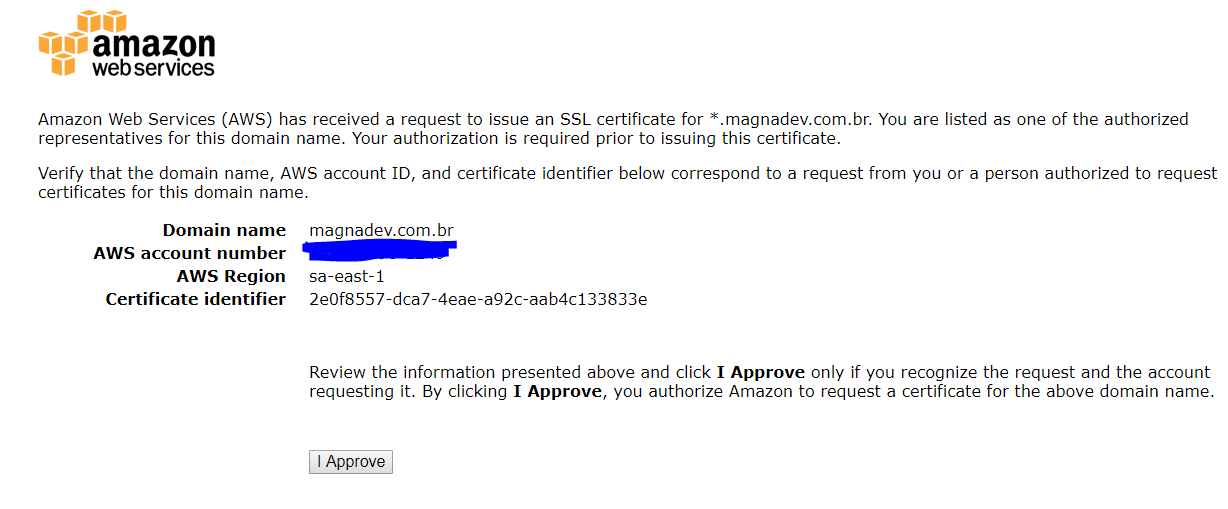
1.8) Confirming the certificate
Just confirm your SSL/TLS certificate and congrats you have an AWS Certificate now!
2) Creating an EC2 server running Windows Server 2016
If you have an EC2 server configured and running Windows Server 2016 please skip to Creating and configuring an Application Load Balancer.
2.1) Choosing an AMI
Select Windows 2016 Server 64 Bits Base AMI.
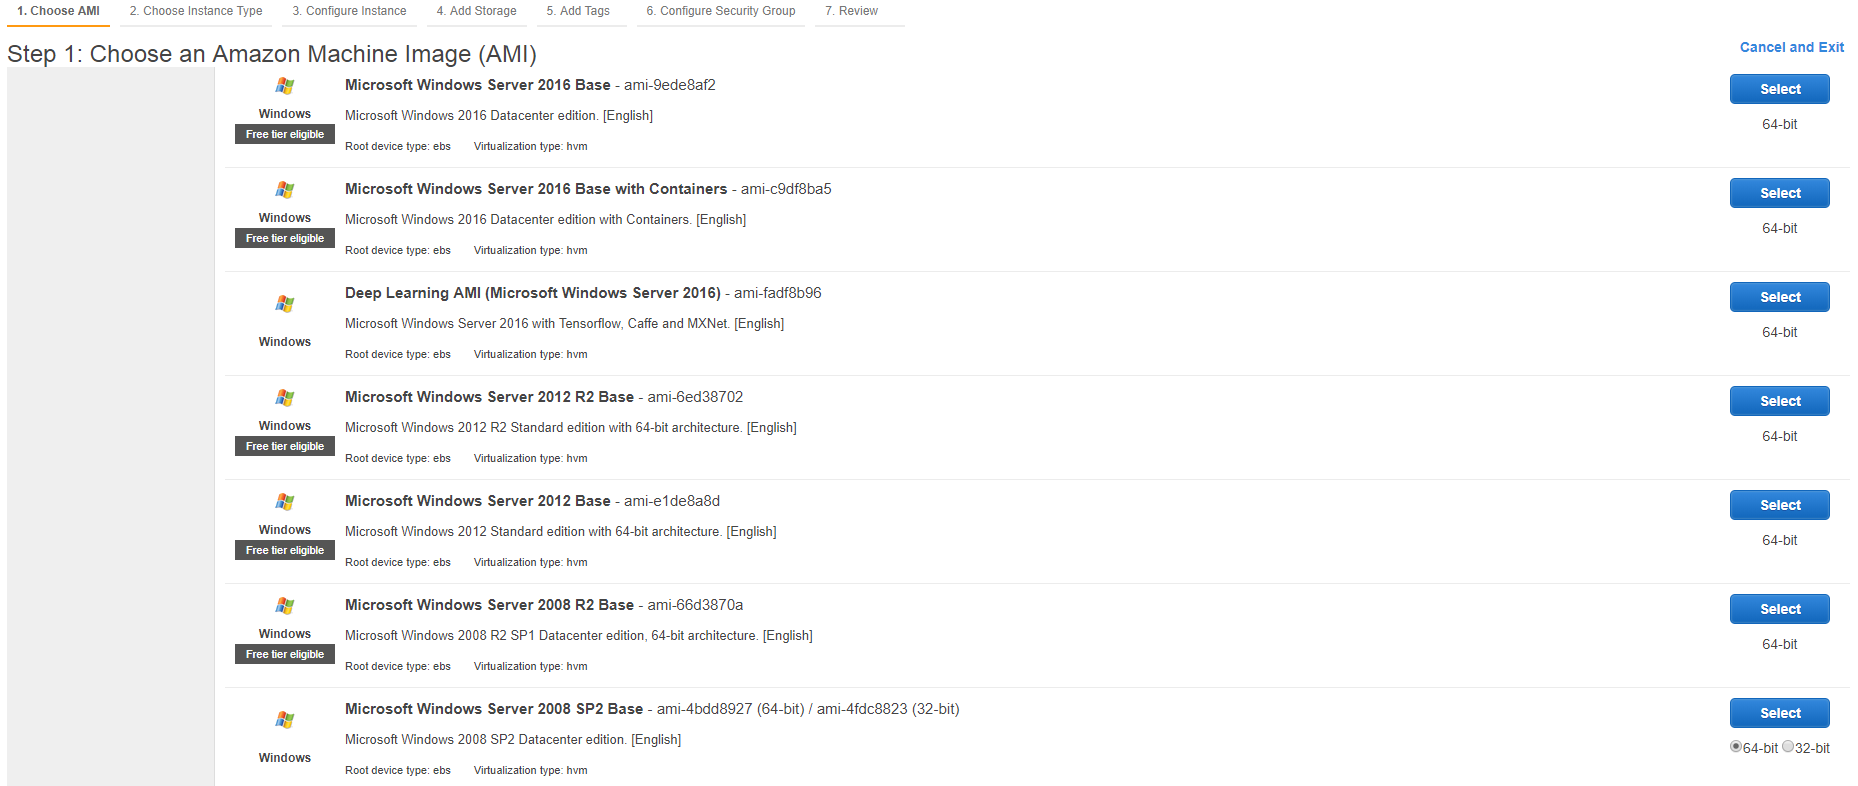
IMPORTANT: You need to install and configure IIS and this article will not talk about it.
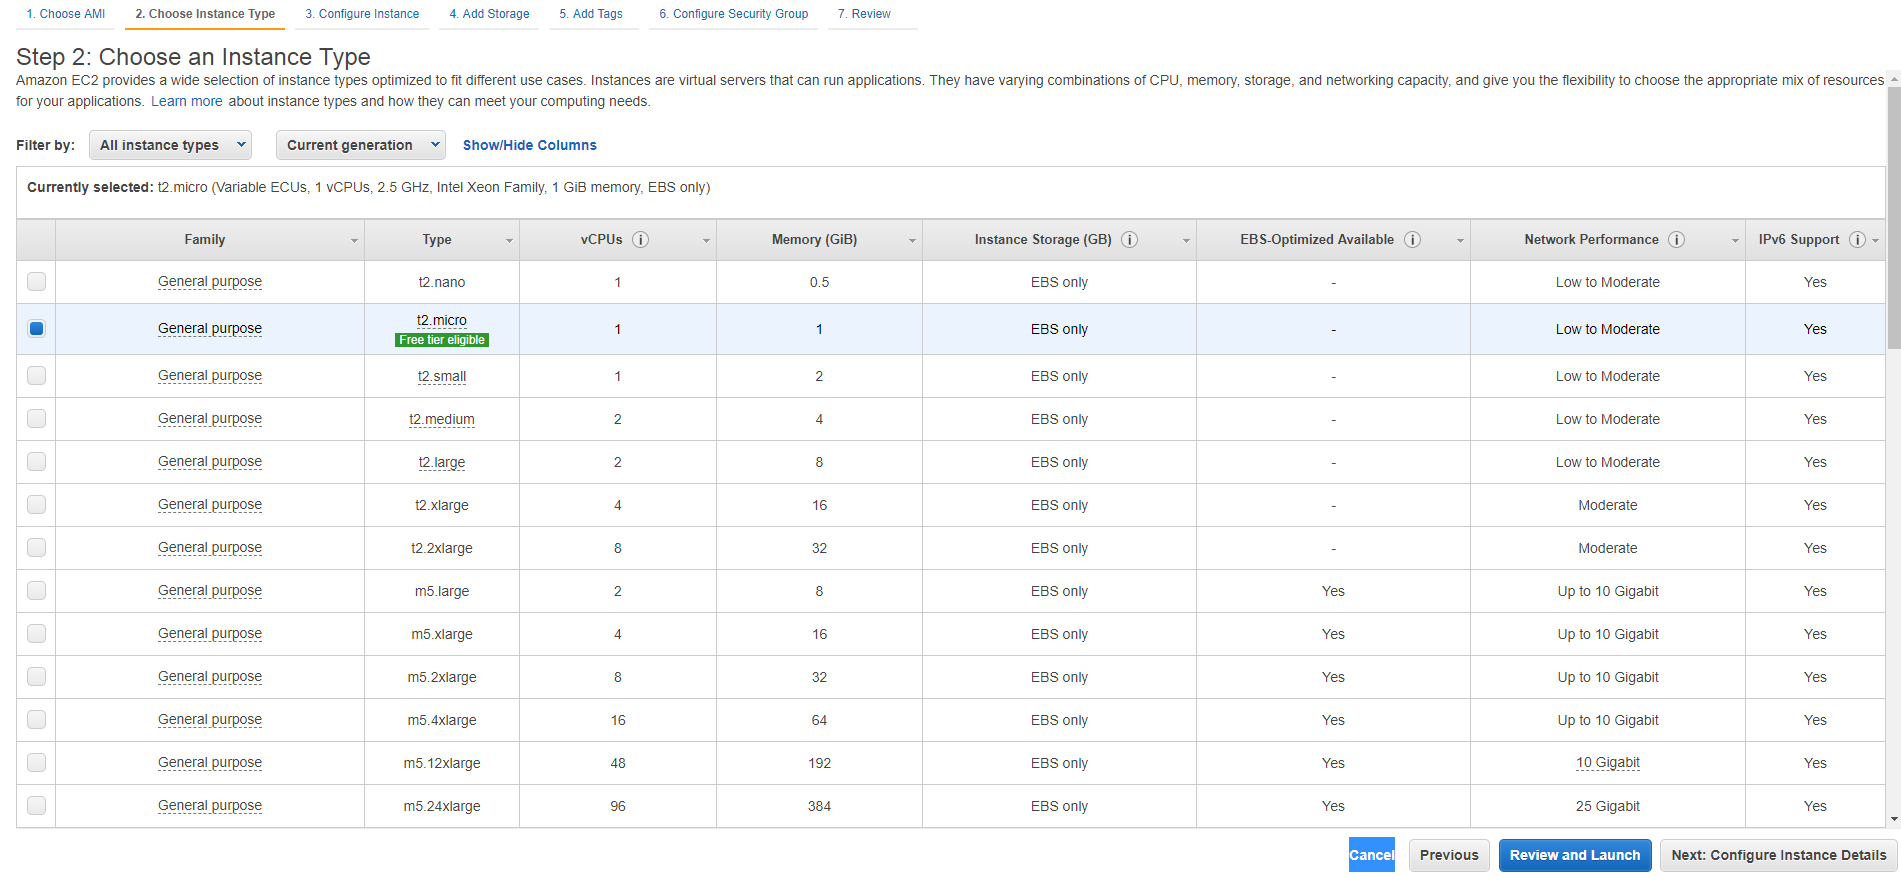
2.2) Choosing an Instance Type
Choose any EC2 Instance Type and of course, pay attention about prices and differences each one. In this article a T2.Micro instance type AMI will be use.
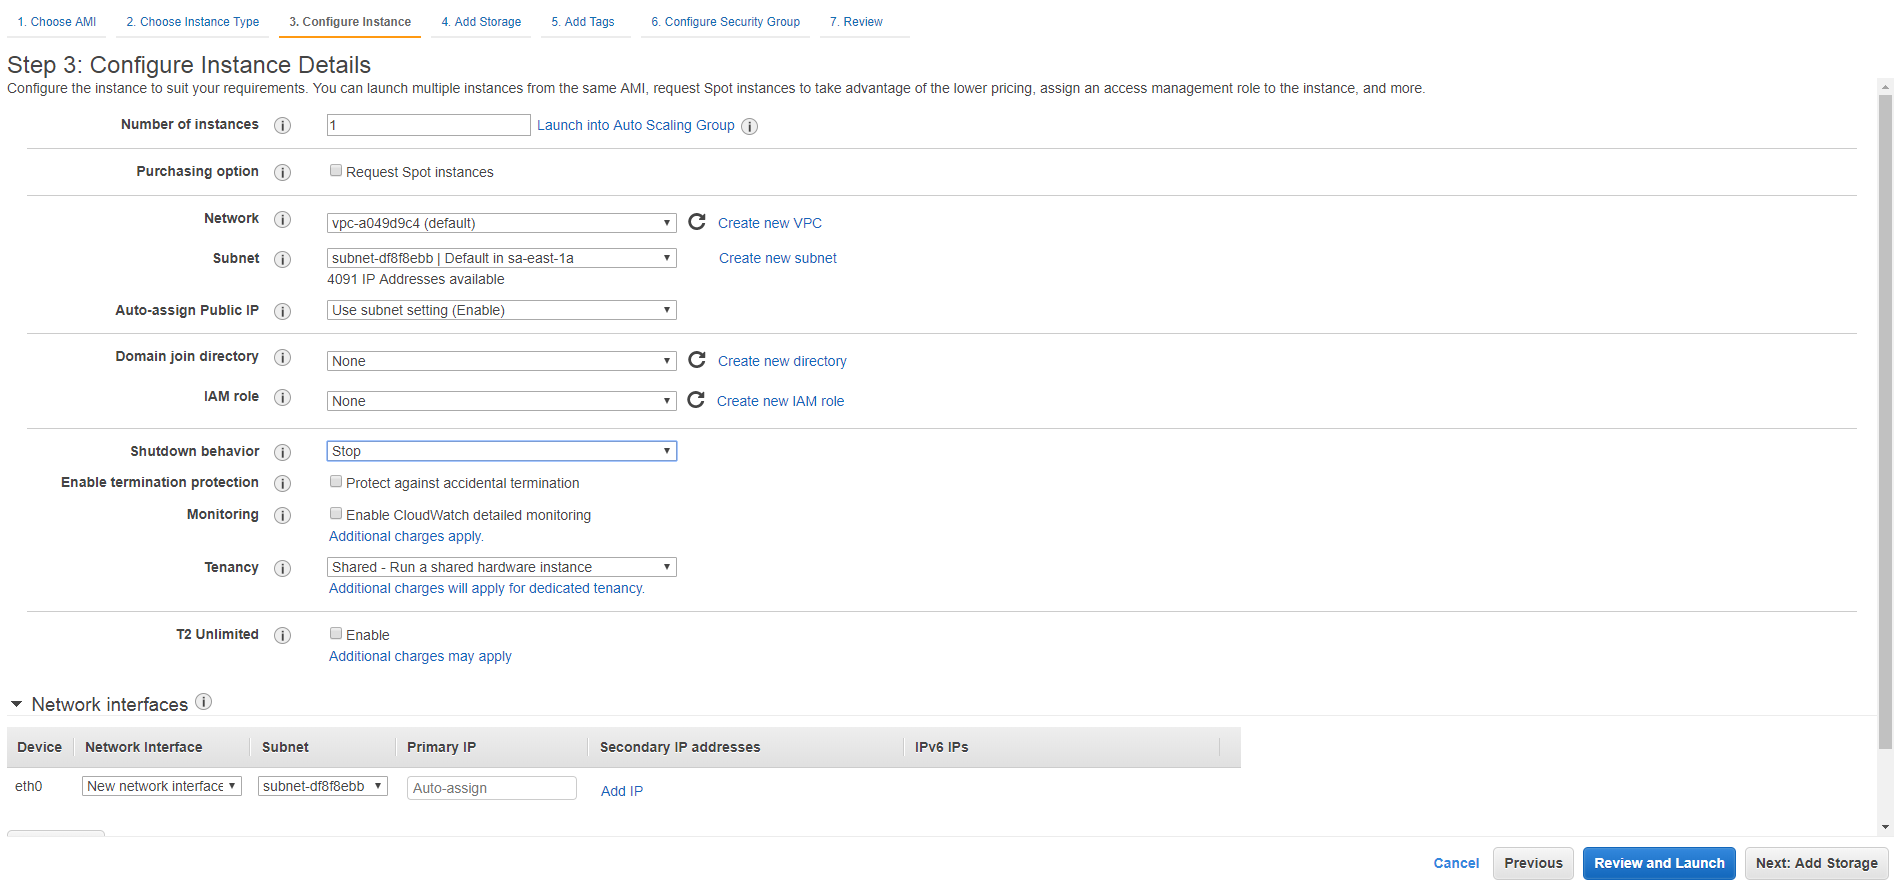
2.3) Configuring Instance Details
In this step there are a lot of items for configuring, but let’s keep the focus on minimium and necessary items like Network, SubtNet and Autosign IP. Just keep the default network and choose avaible subnet for the following Network. It’s important to keep checked auto-assign public IP because the EC2 needs to be public for the Load Balancer.
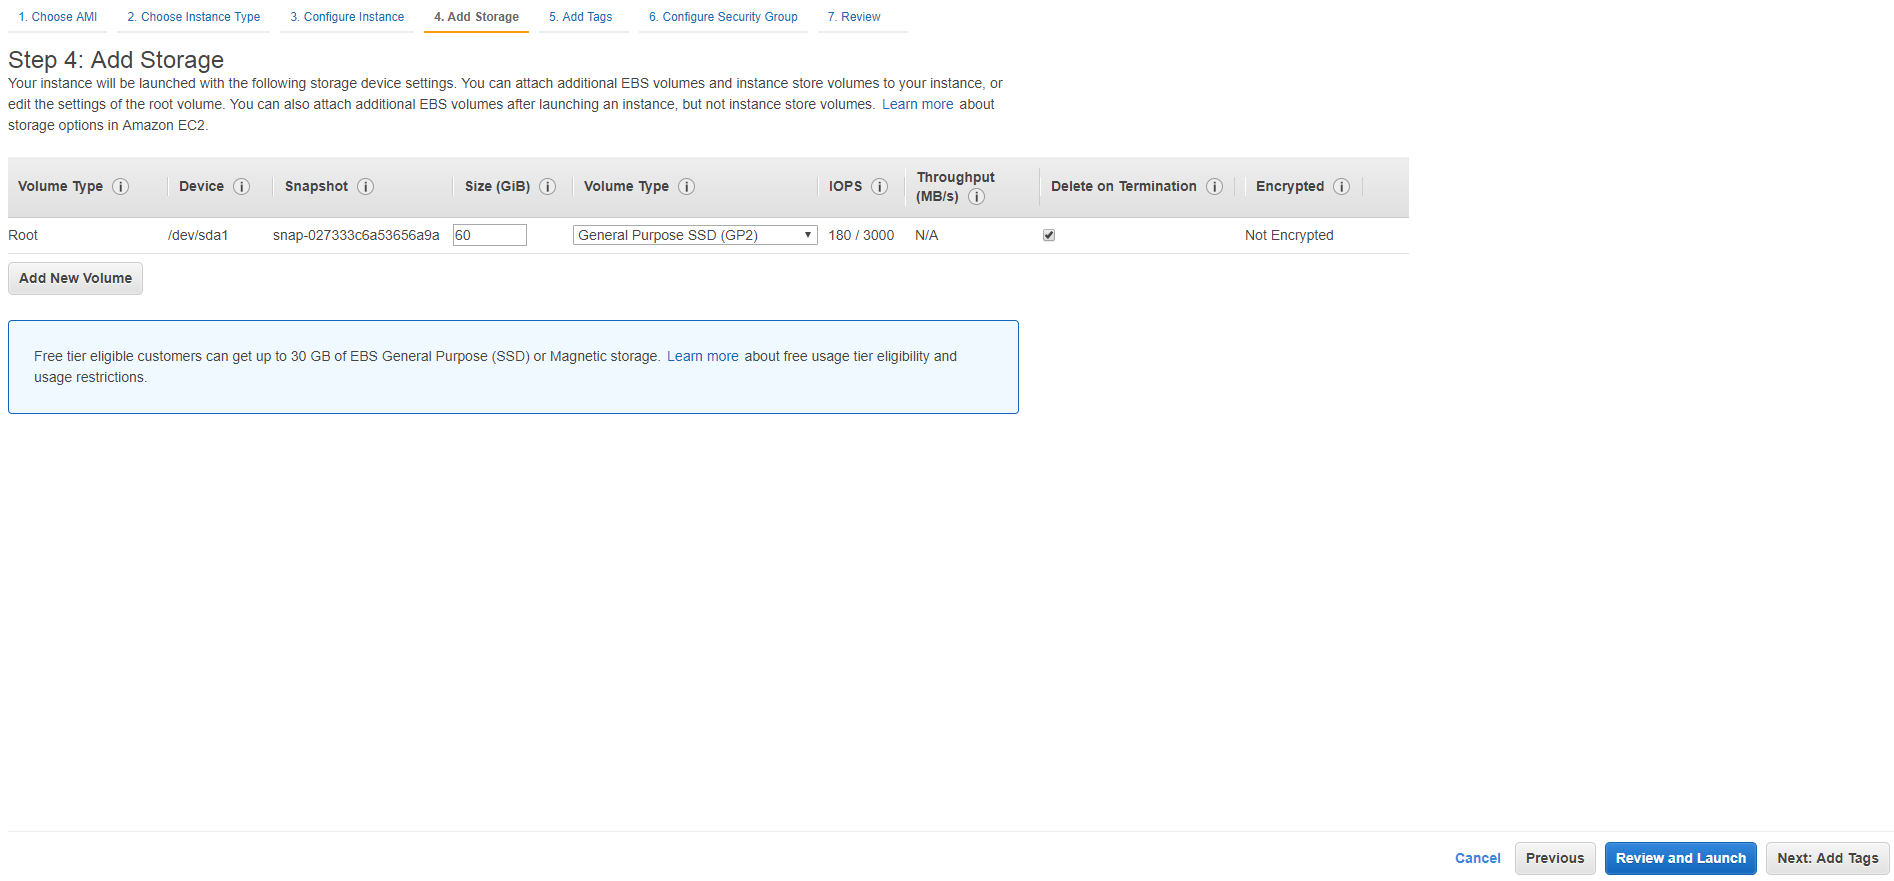
2.4) Adding EBS Storage
A simple and cheap magnetic disk it’s enough for small apps, but I really recommend SSD disks from sketch even if this is your scenario. The reason? It’s painfull changing EBS disk type after EC2 is running in production.
2.5) Defining Key Tags
It’s a good practice for organizing resources in AWS if you keep in mind find and manage quickly each resource.

2.6) Configuring Security Group
I recommend create a new security group, define a good name e additional information. When AWS usage grows up for example EC2s, it’s important to know what kind of Security Group is responsible for.
It’s necessary to open the follow ports:
- Port 80 - Because it’s a web server and you need the port for Load Balancer communication
- Port 443 - To grant SSL/TLS connections
- Port 3389 - To grant access for Remote Desktop Windows.
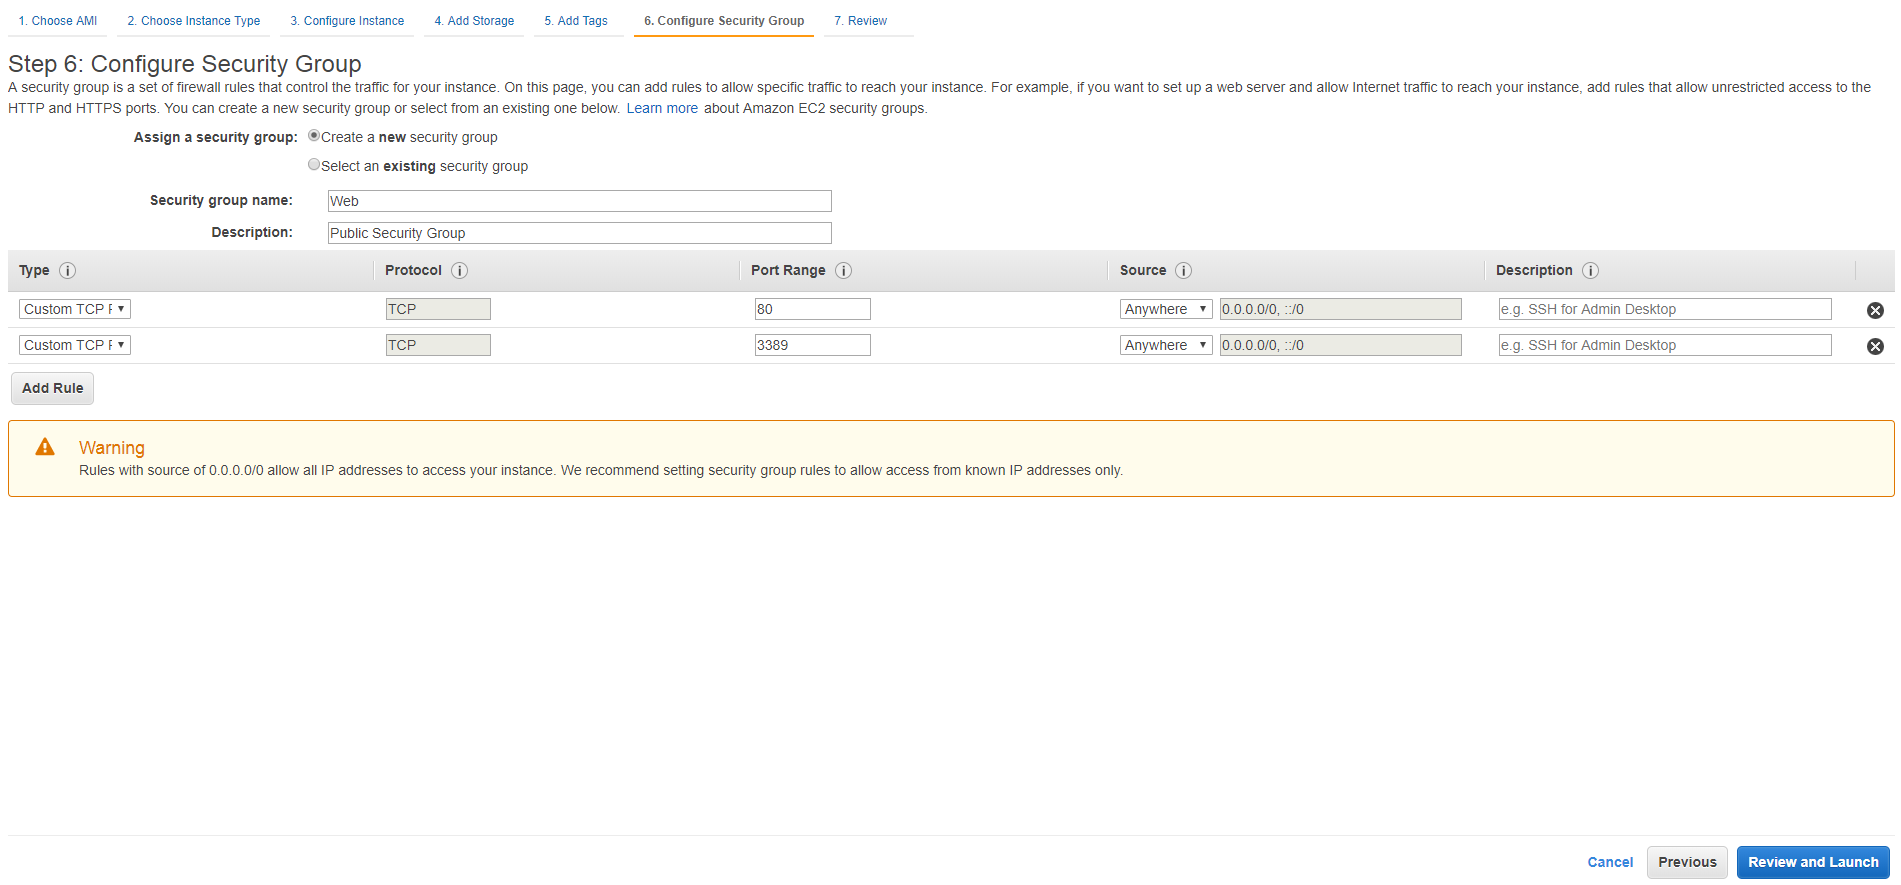 In this screenshot I forgot to add Port 443. Please don’t be like me ;)
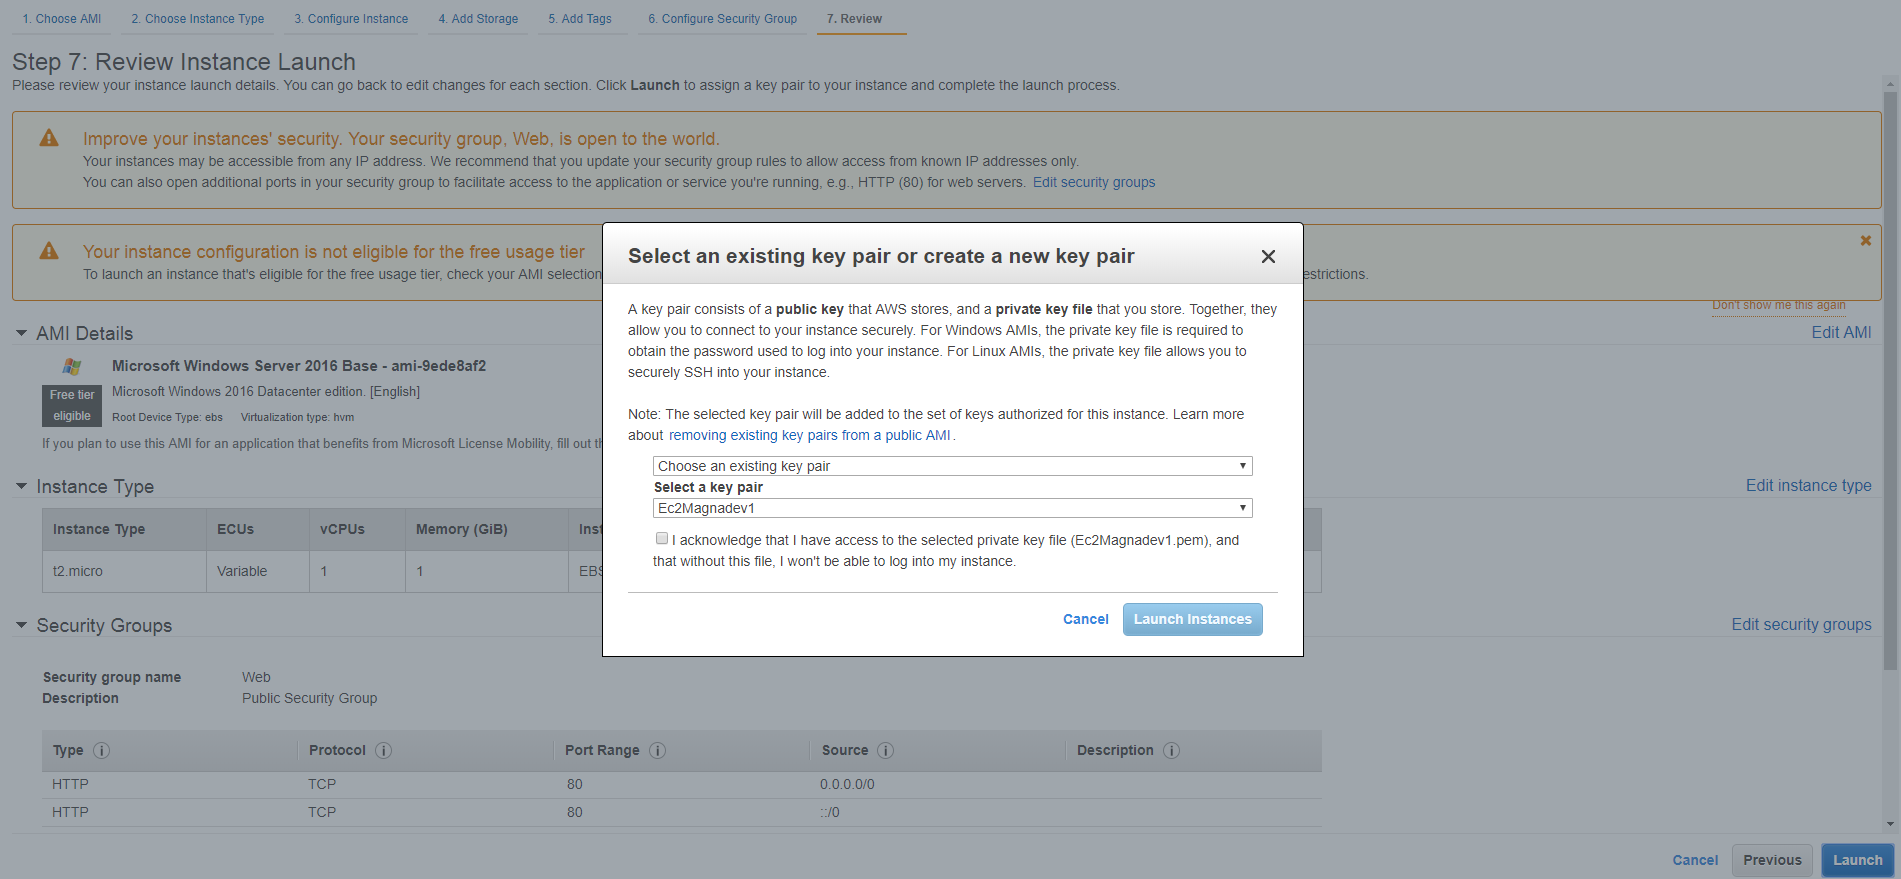
2.7) Creating Key pairs
Finally, create or select existing key pairs for granting access to EC2. Please keep safe the keys!!
2.8) Running Ec2
After the creation steps verify if the Ec2 is running well and test a remote access using Microsoft Remote Desktop. If you don’t know how to do it please read this article.

3) Creating and configuring an Application Load Balancer
Why we must have to create a Load Balancer? The answer is to use it with a AWS Certificate (from AWS Certificate Manager). But, is it possible to “attach” the AWS Certificate directly on EC2? No! It’s not possible. When you create a Load Balancer with ACM it ables a cryptografied connection for the whole traffic, this security layer (let’s say it) will be use between EC2 and DNS Zone. This is another big gain of productivity because there is no need to setup a certificate in OS (ex: Windows).
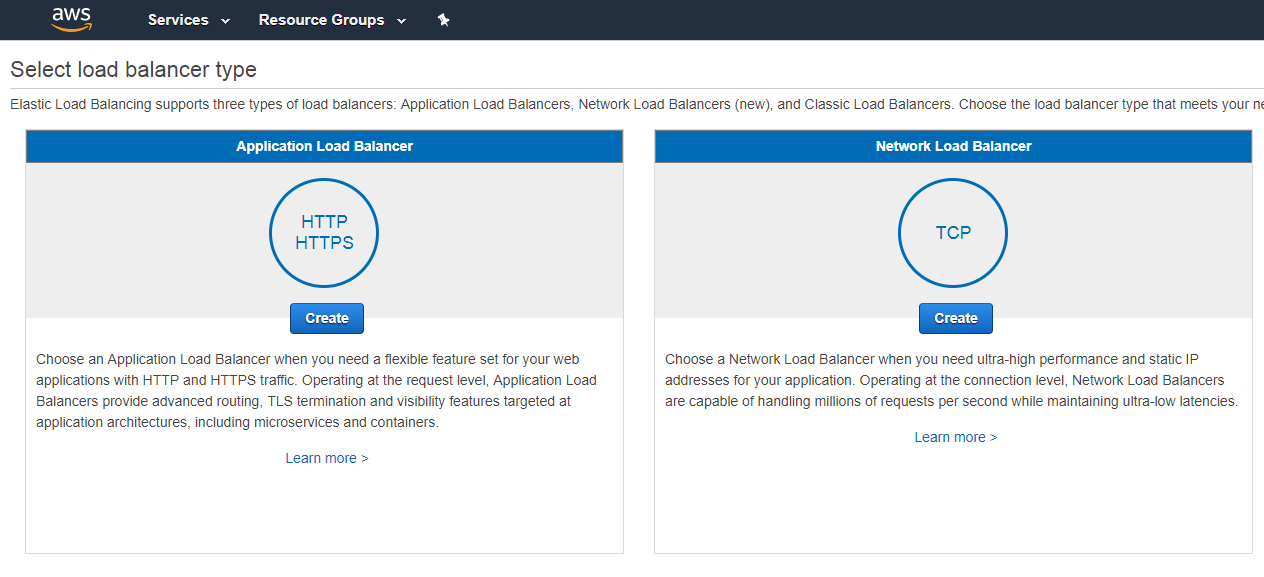
In AWS there are three options for Load Balancer:
• Application Load Balancer: Choose an Application Load Balancer when you need a flexible feature set for your web applications with HTTP and HTTPS traffic. Operating at the request level, Application Load Balancers provide advanced routing, TLS termination and visibility features targeted at application architectures, including microservices and containers.
• Network Load Balancer: Choose a Network Load Balancer when you need ultra-high performance and static IP addresses for your application. Operating at the connection level, Network Load Balancers are capable of handling millions of requests per second while maintaining ultra-low latencies.
• Classic Load Balancer (depreceated) (previously Load Balancer. Nowadays you can use Application Load Balancer)
3.1) Selecting an Application Load Balancer
In this article the Application Load Balancer will be choose.
3.2) Basic Configuration, Listeners and Availability Zones
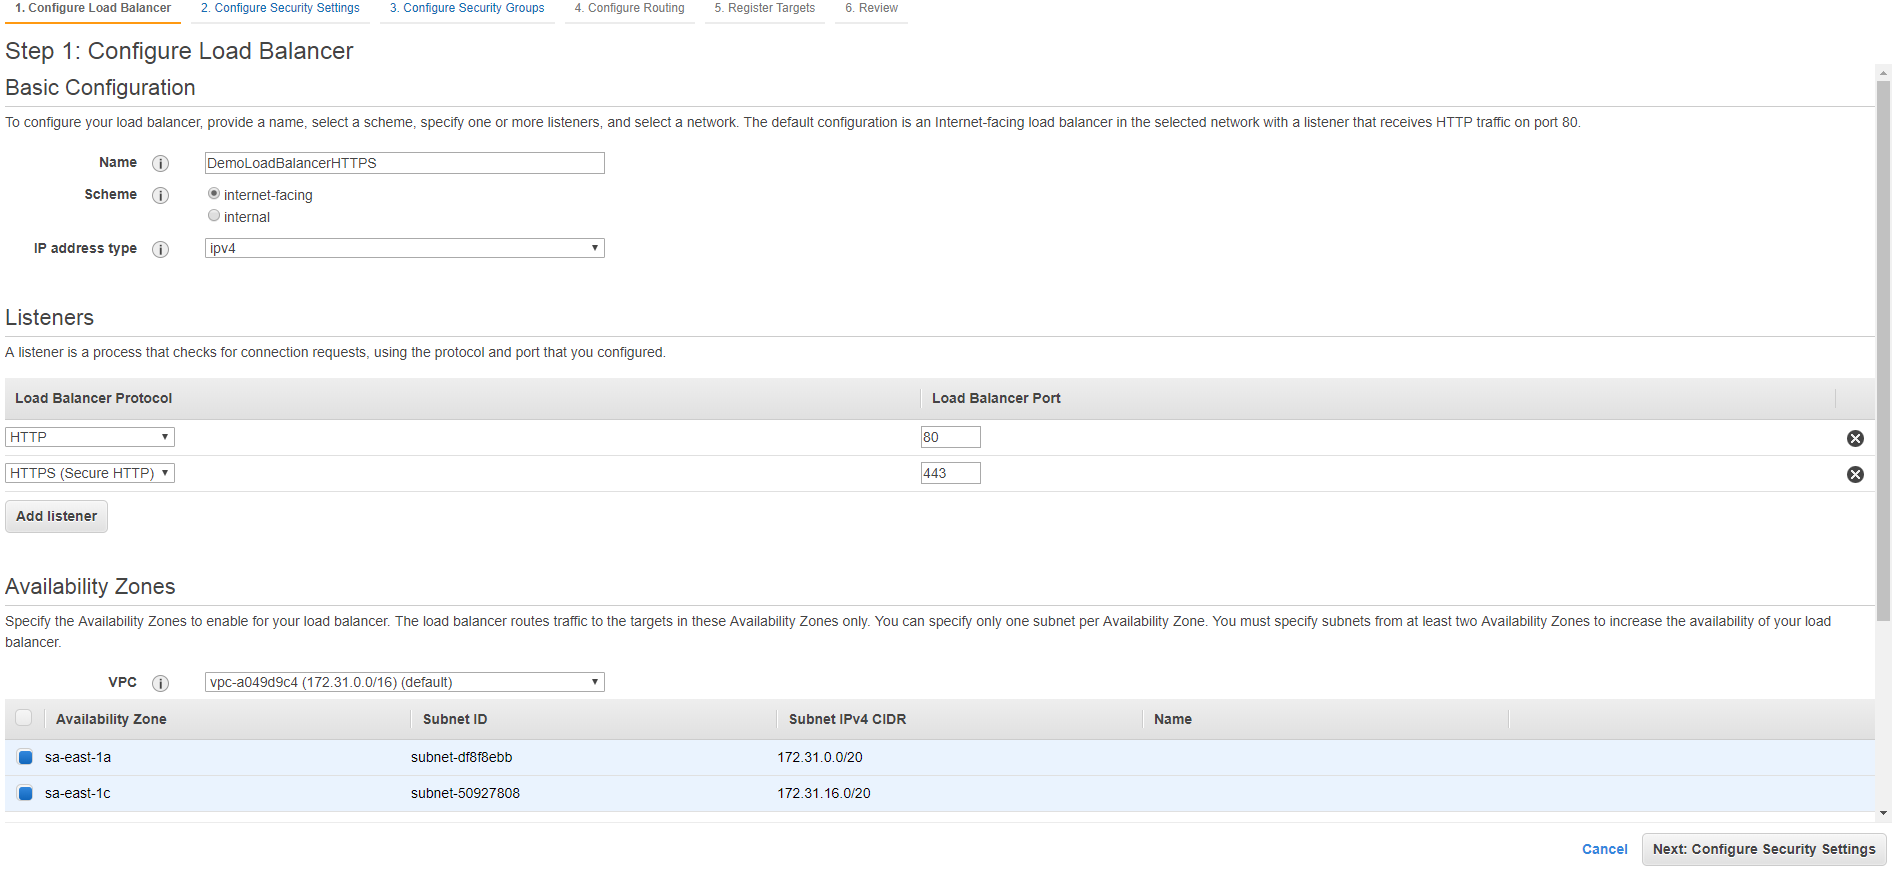
Basic Configuration To define the basic configuration first of all write a name for the Load Balancer. Second, keep the same information in Scheme(internet-facing) and IPv4. It’s possible using IPv6 or create a LB for internal usage (without public ip). It’s not the case for this article.
Listeners This the way how your LB can listen and check connections request. For this example, is necessary to configure HTTP (port 80) and HTTPS (443 port).
Availability Zones Keep the VPC default or if you account have more than one select the right VPC. The VPC will return a list of availability zones and it’s required to select more than one zone.
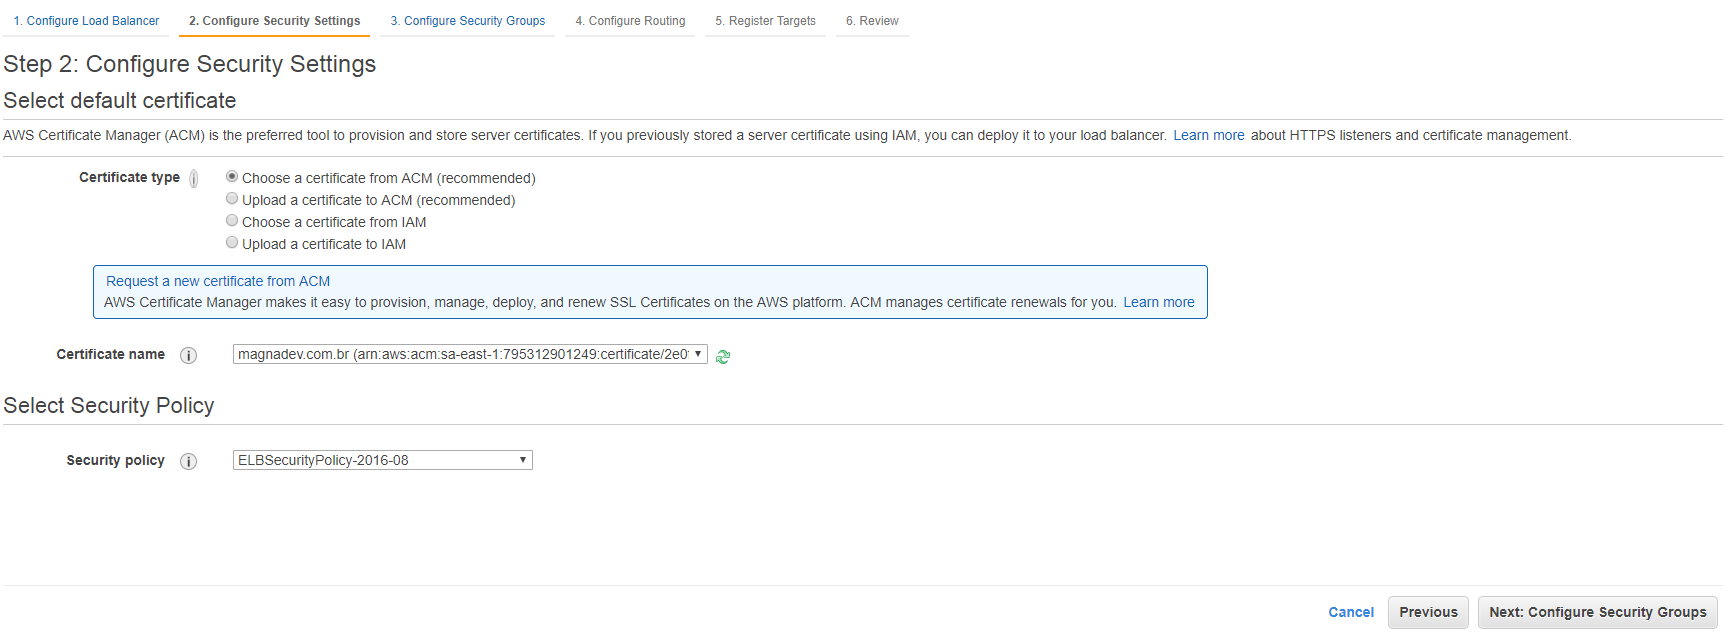
3.2) Security Settings
If the ACM was configured correctly it will show in the Certificate Selectlist. Select it, it’s time to improve SSL/TLS security.
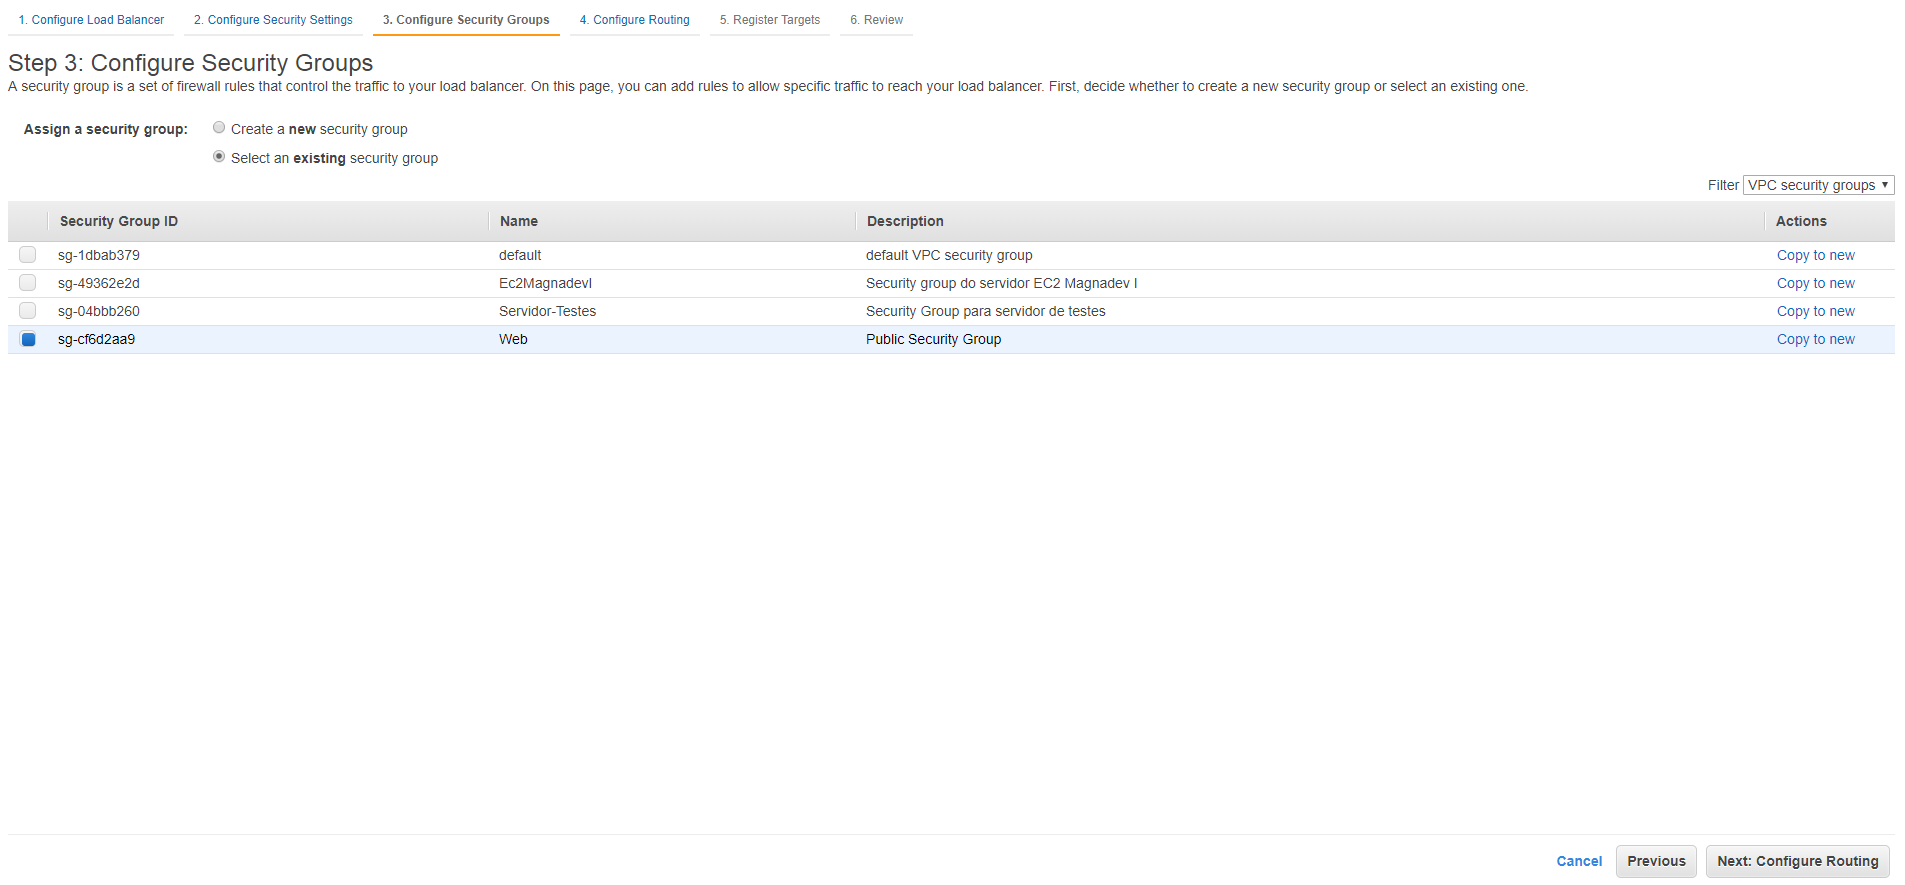
3.3) Security Group
Select the SAME security group that your EC2 server are using. This is a commoum mistake during ELB configuration, many people select differents security groups and some of their has ports that are disallowed. This kind of lack of attention will do you waste much time until discovery the problem.
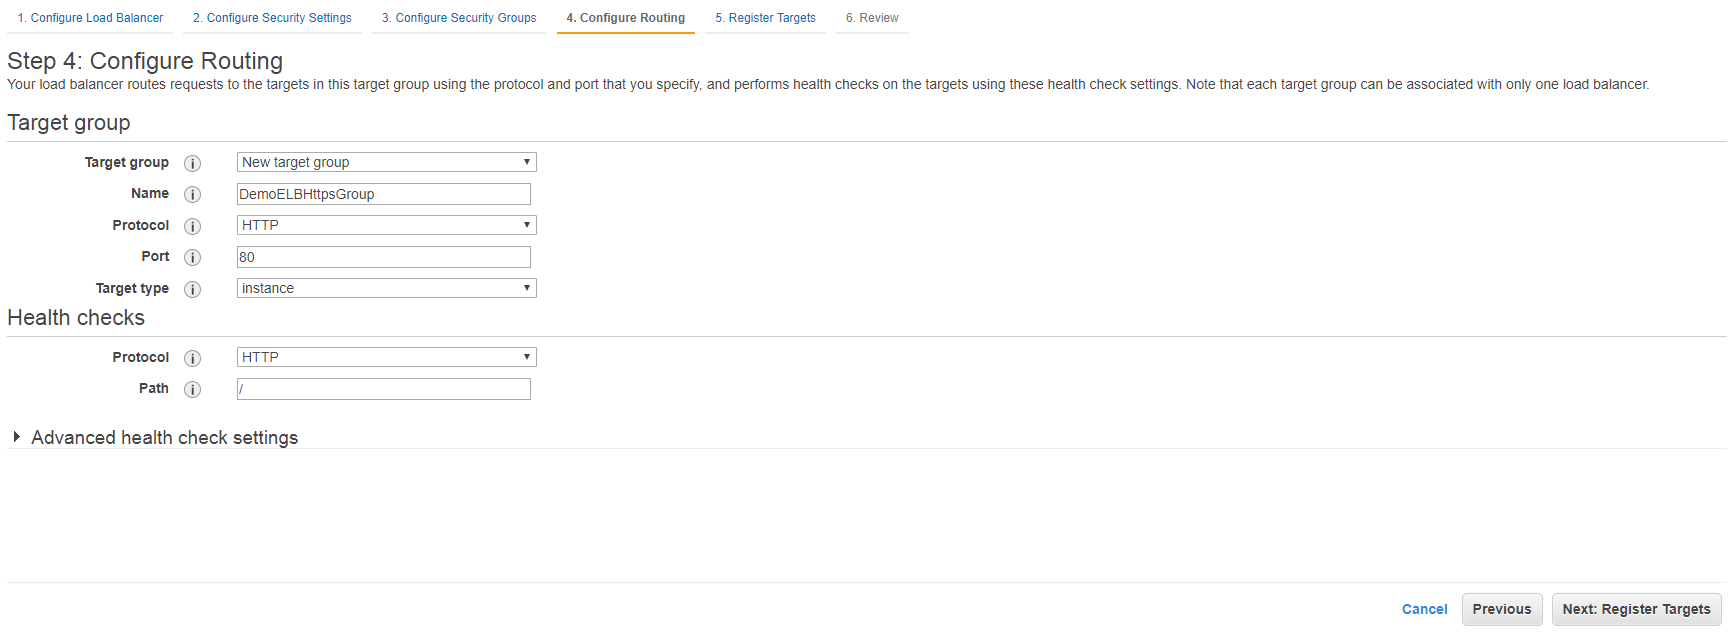
3.4) Configuring Routing
Just keep all of information and define a name for the ELB Group. This part of configuration deals with routing requests to the targets (next config step) and provide a heath check layer (monitoring).
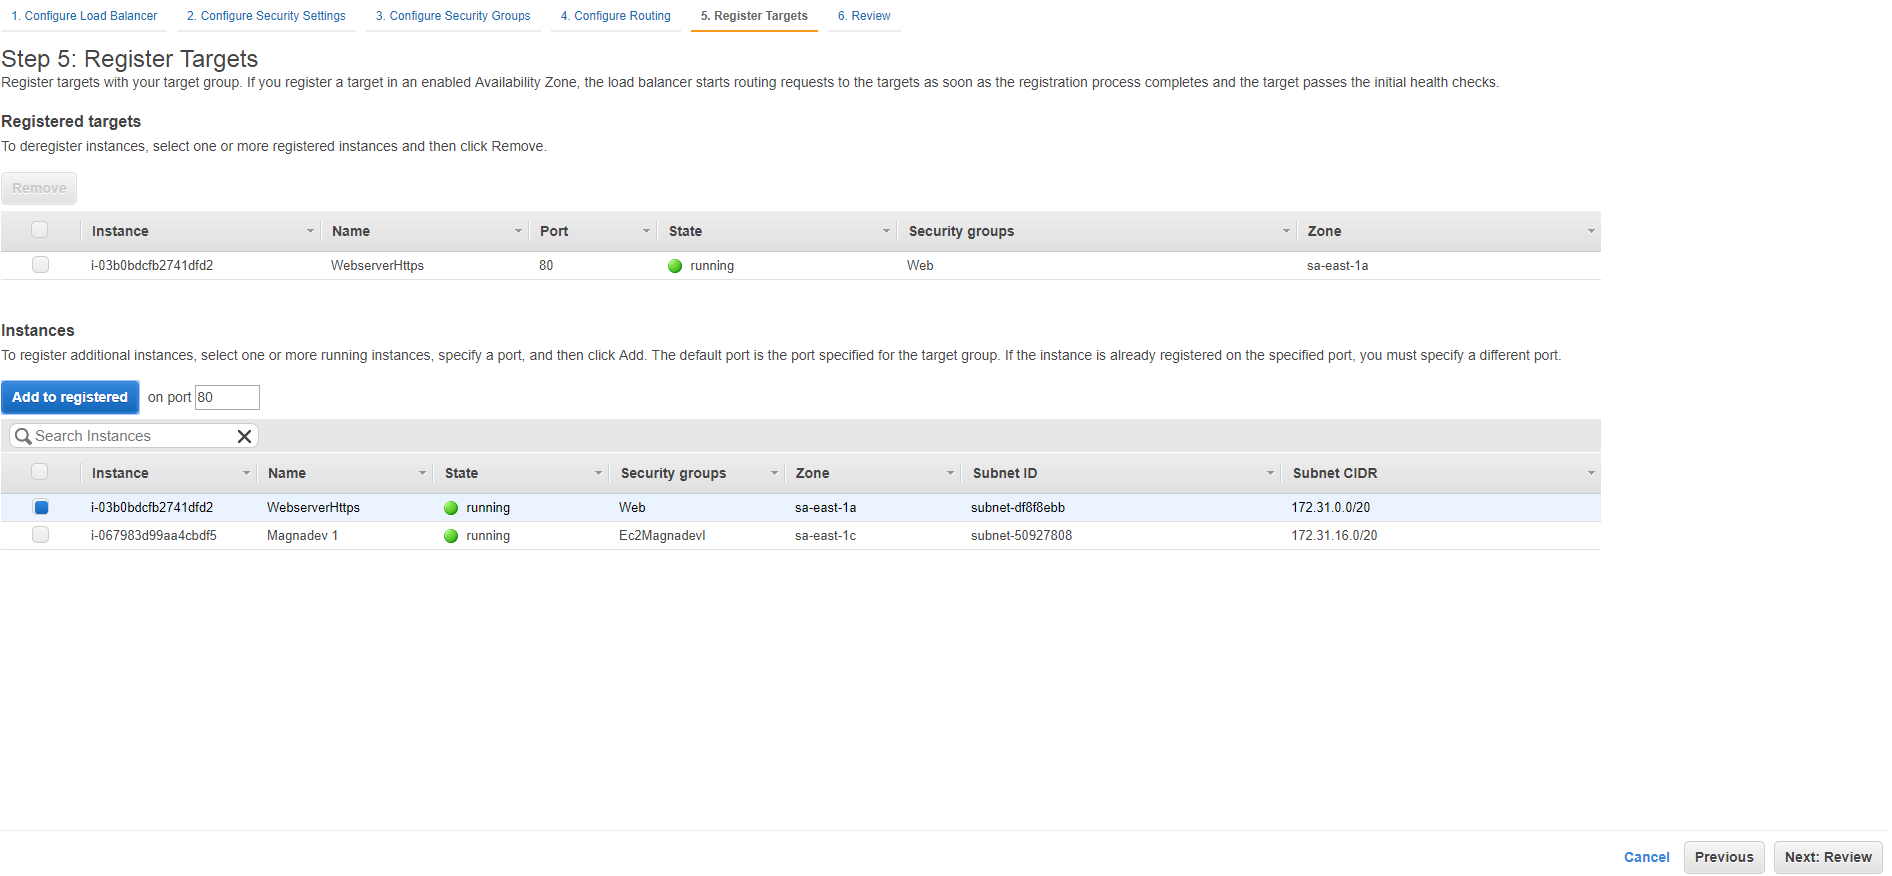
3.5) Registering Targets
Maybe during the steps you thinked “Where on earth is the EC2s server?” In this step it’s time to select EC2 servers. In this article, just one EC2 server is enough, yes I know it’s sounds wierd but at end of this article the goal is just running HTTPS using ACM. The Load Balancer is the way to reach the goal, but its real capabilities will not be use for it.
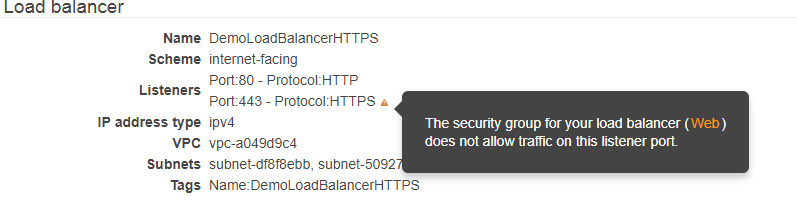
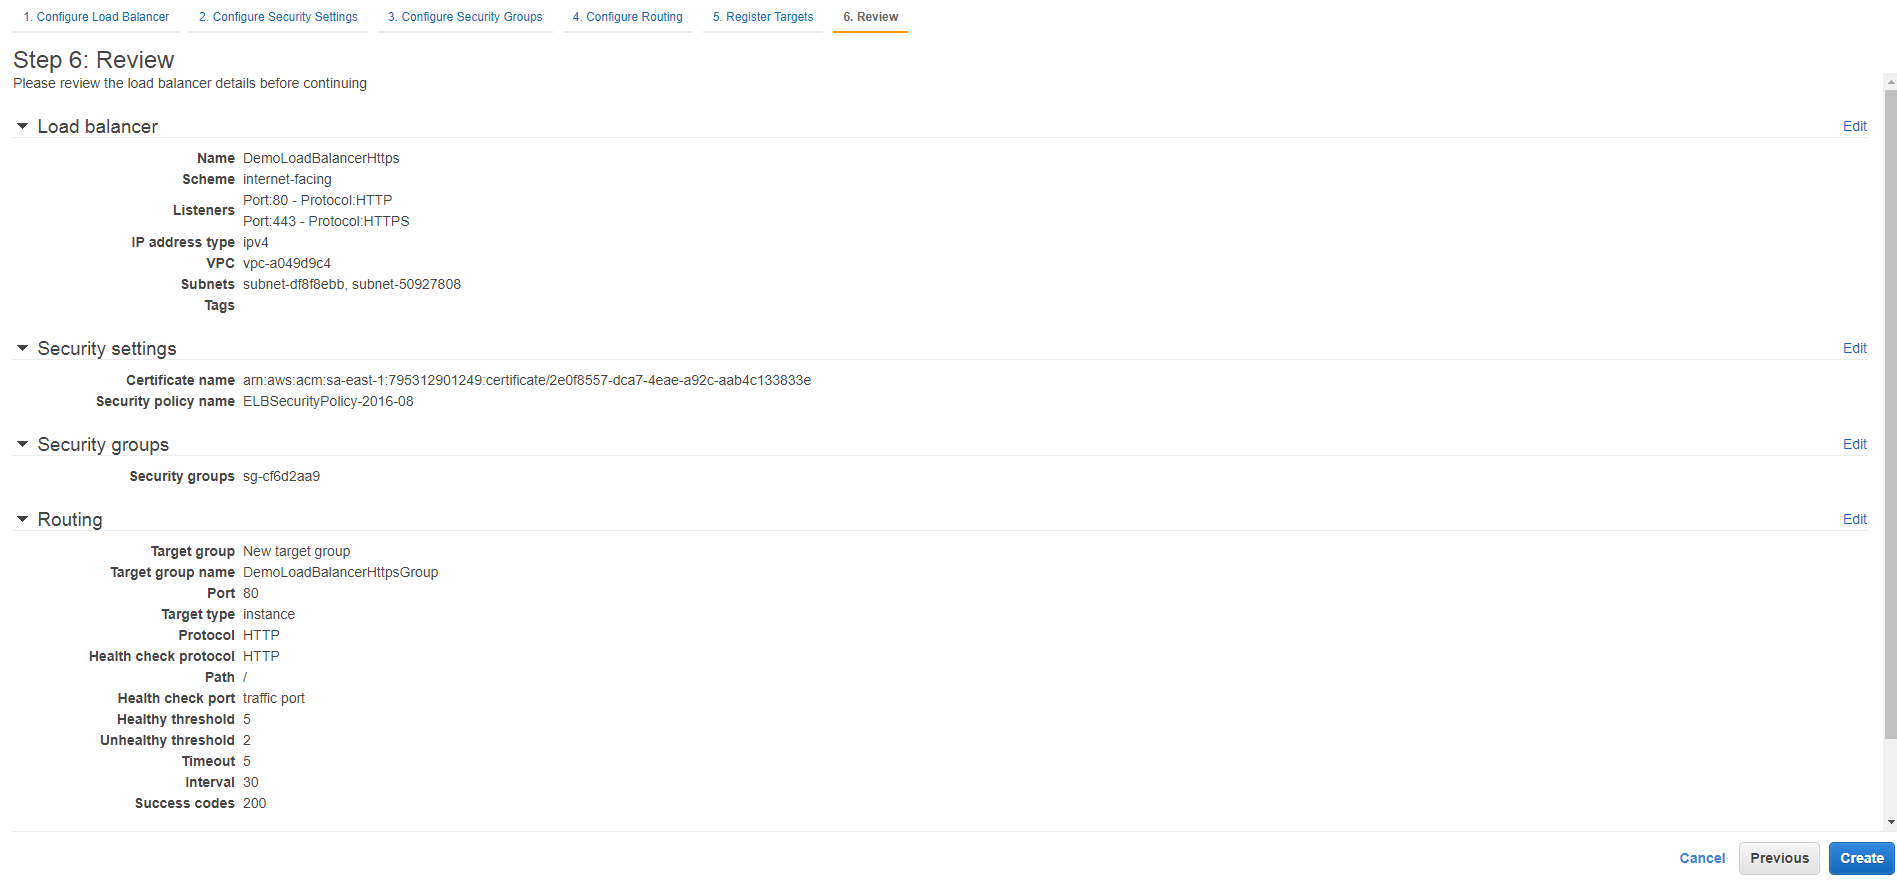
3.5) Review
If you follow right these steps the Review page will show that everything is ok, but, if you received a warning message about Security Group, it’s because you forgot to grant port 443. Please, go back and review your Security Group.
Review all information that was configured and create the ELB.
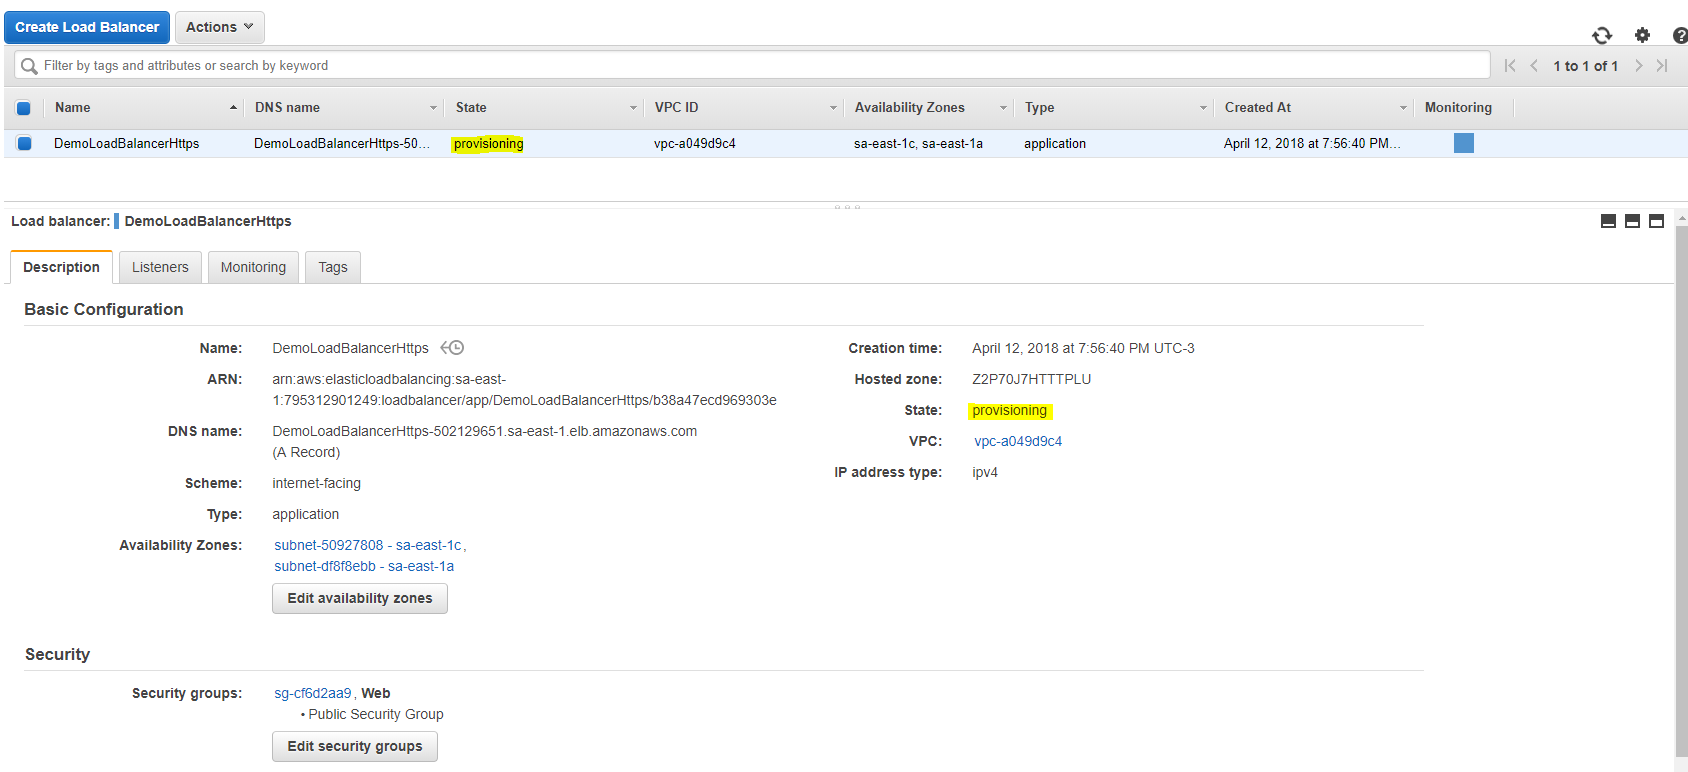
3.6) Waiting for active status
ELB process creation needs a couple of minutes to be done. The status “provisioning” will change to active while it doesn’t happen smell the flowers and drink a coffee.

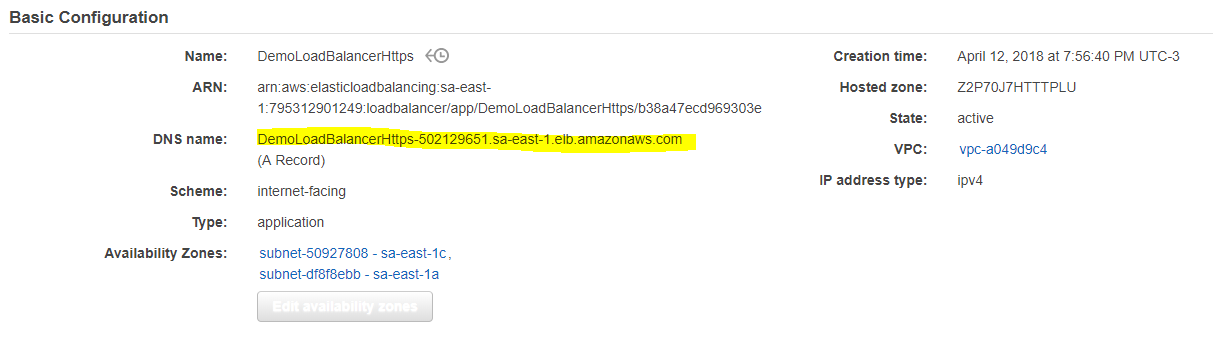
3.7) Testing
For testing the recently ELB created, just copy the DNS name from ELB Basic configuration put in the browser.
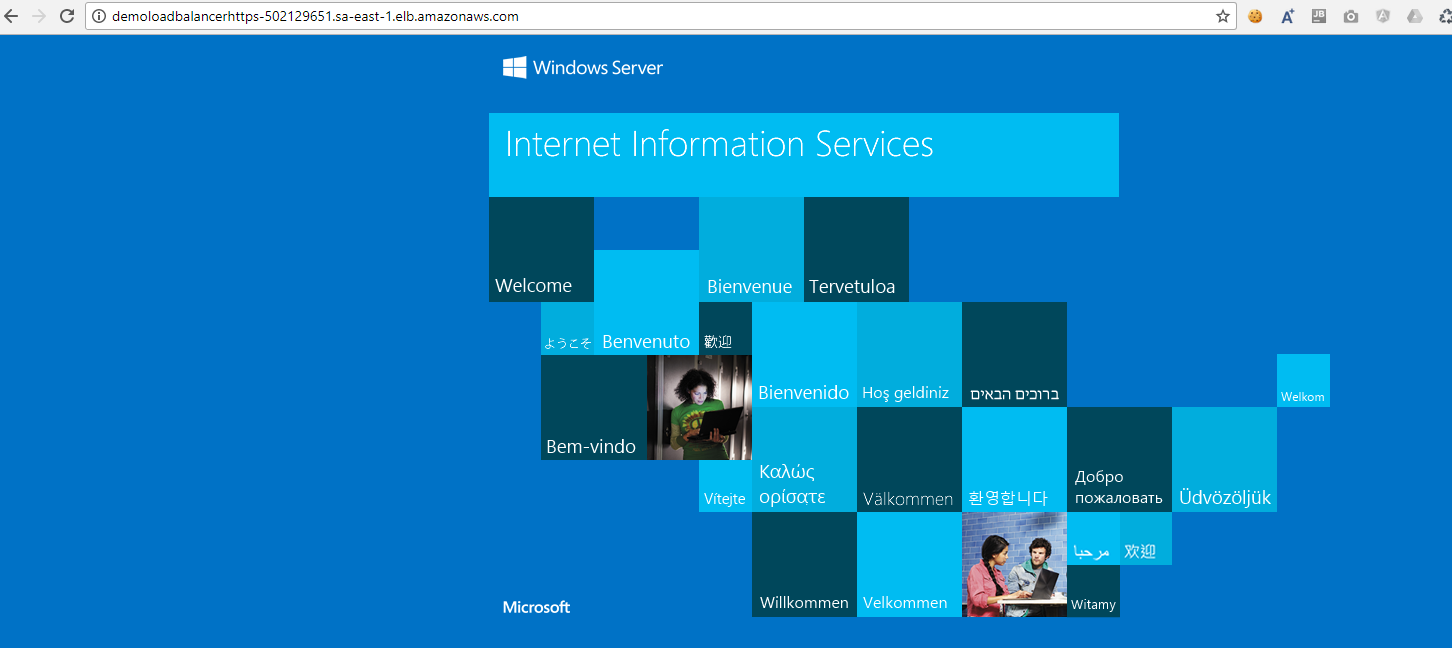
If everything was ok, the access will be route to EC2 Server through ELB DNS Name.
To test HTTPS just change the protocol HTTP to HTTPS.
IMPORTANT: The certificate will not be valid in this access because the configuration of ACM used specific domain and subdomain (see topic 1.2 an 1.3)
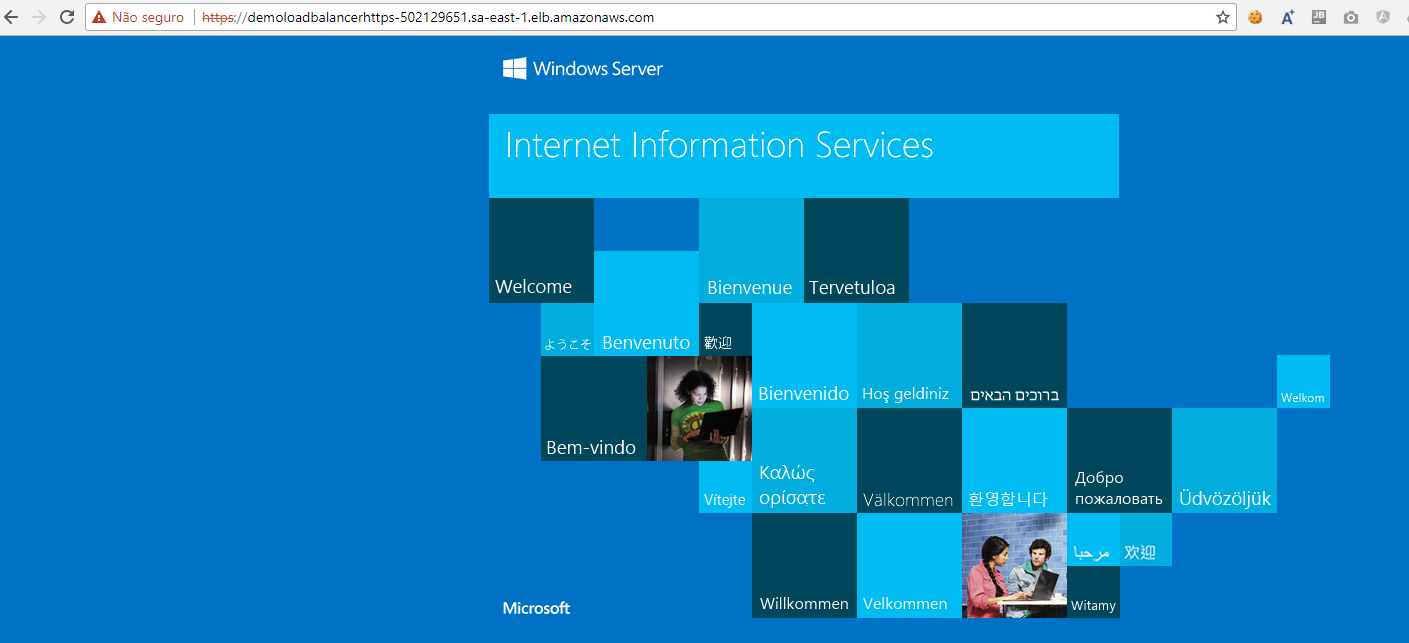
To solve this problem you need to configure DNS in Route 53.
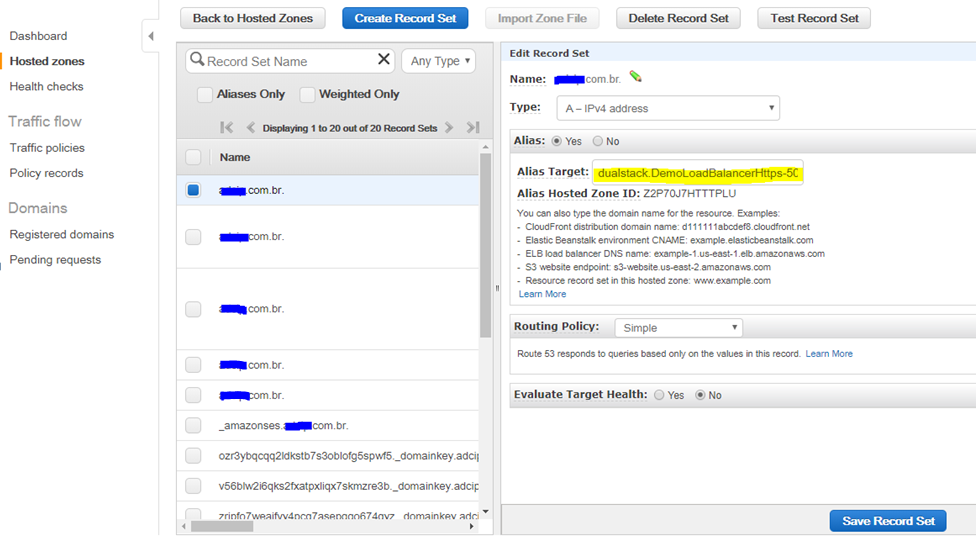
4) Updating DNS zone
To configure DNS zone with ELB is necessary first of all a DNS Zone configured. After that you just need to change the value of entry A (normally an IP) with the ELB DNS. To perform this, select “Alias: Yes”, find the recent ELB created and select it.
It’s necessary a couple of minutes for the DNS zone understand there are a ELB between EC2 IP. If you did all things correctly just enter with the domain name to access the server through EBL.
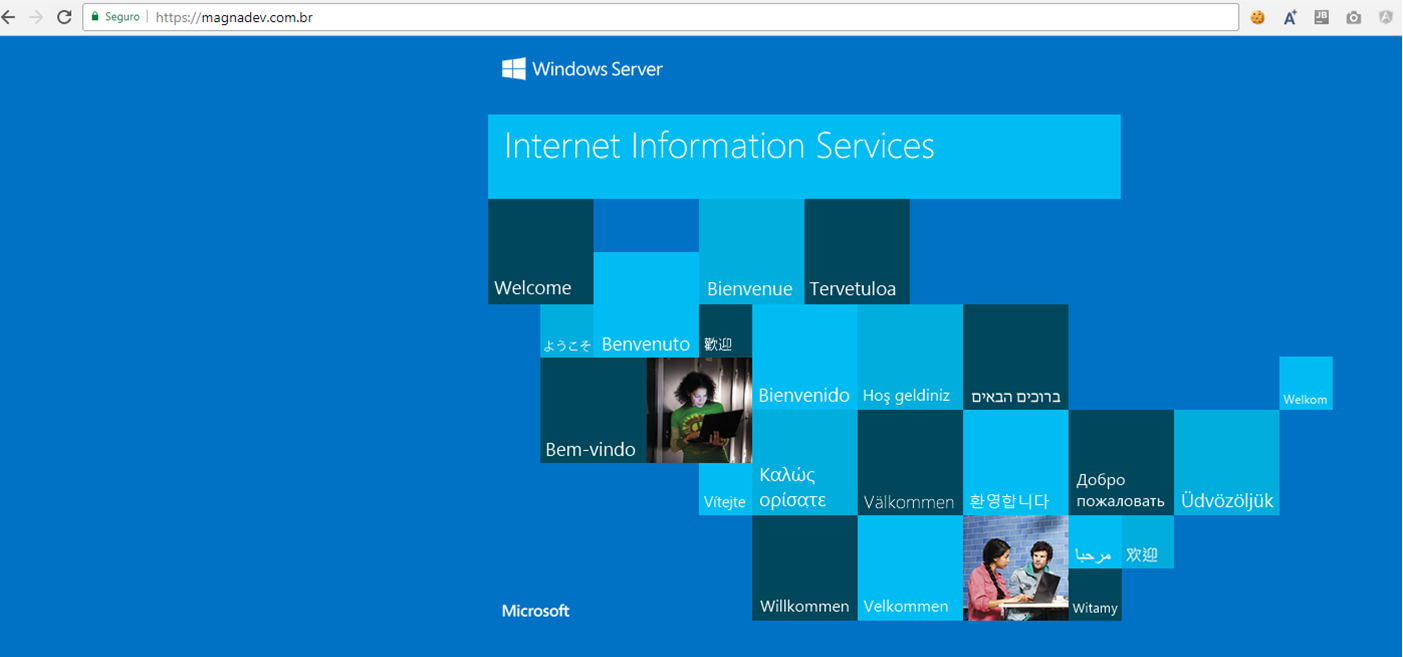
After a couple of minutes, try to access using you domain with HTTP or HTTPS. The DNS is alread routting to ELB and ACM granting a valid certificate to domain. If you followed each step carefully: CONGRATULATIONS YOU HAVE A SSL CERTIFICATE RUNNING ON AWS EC2
IMPORTANT!
There are some application adjustments and SEO best practices that you need to consider:
- Apply Canonical HTTP to HTTPS. Should have exists only access using HTTPs.
- Certify resource paths (img/js/css resources) all of them must rewrite HTTP to HTTPs.
- Each old url (HTTP) must be redirect to (HTTPs). Use 301 redirect for it.